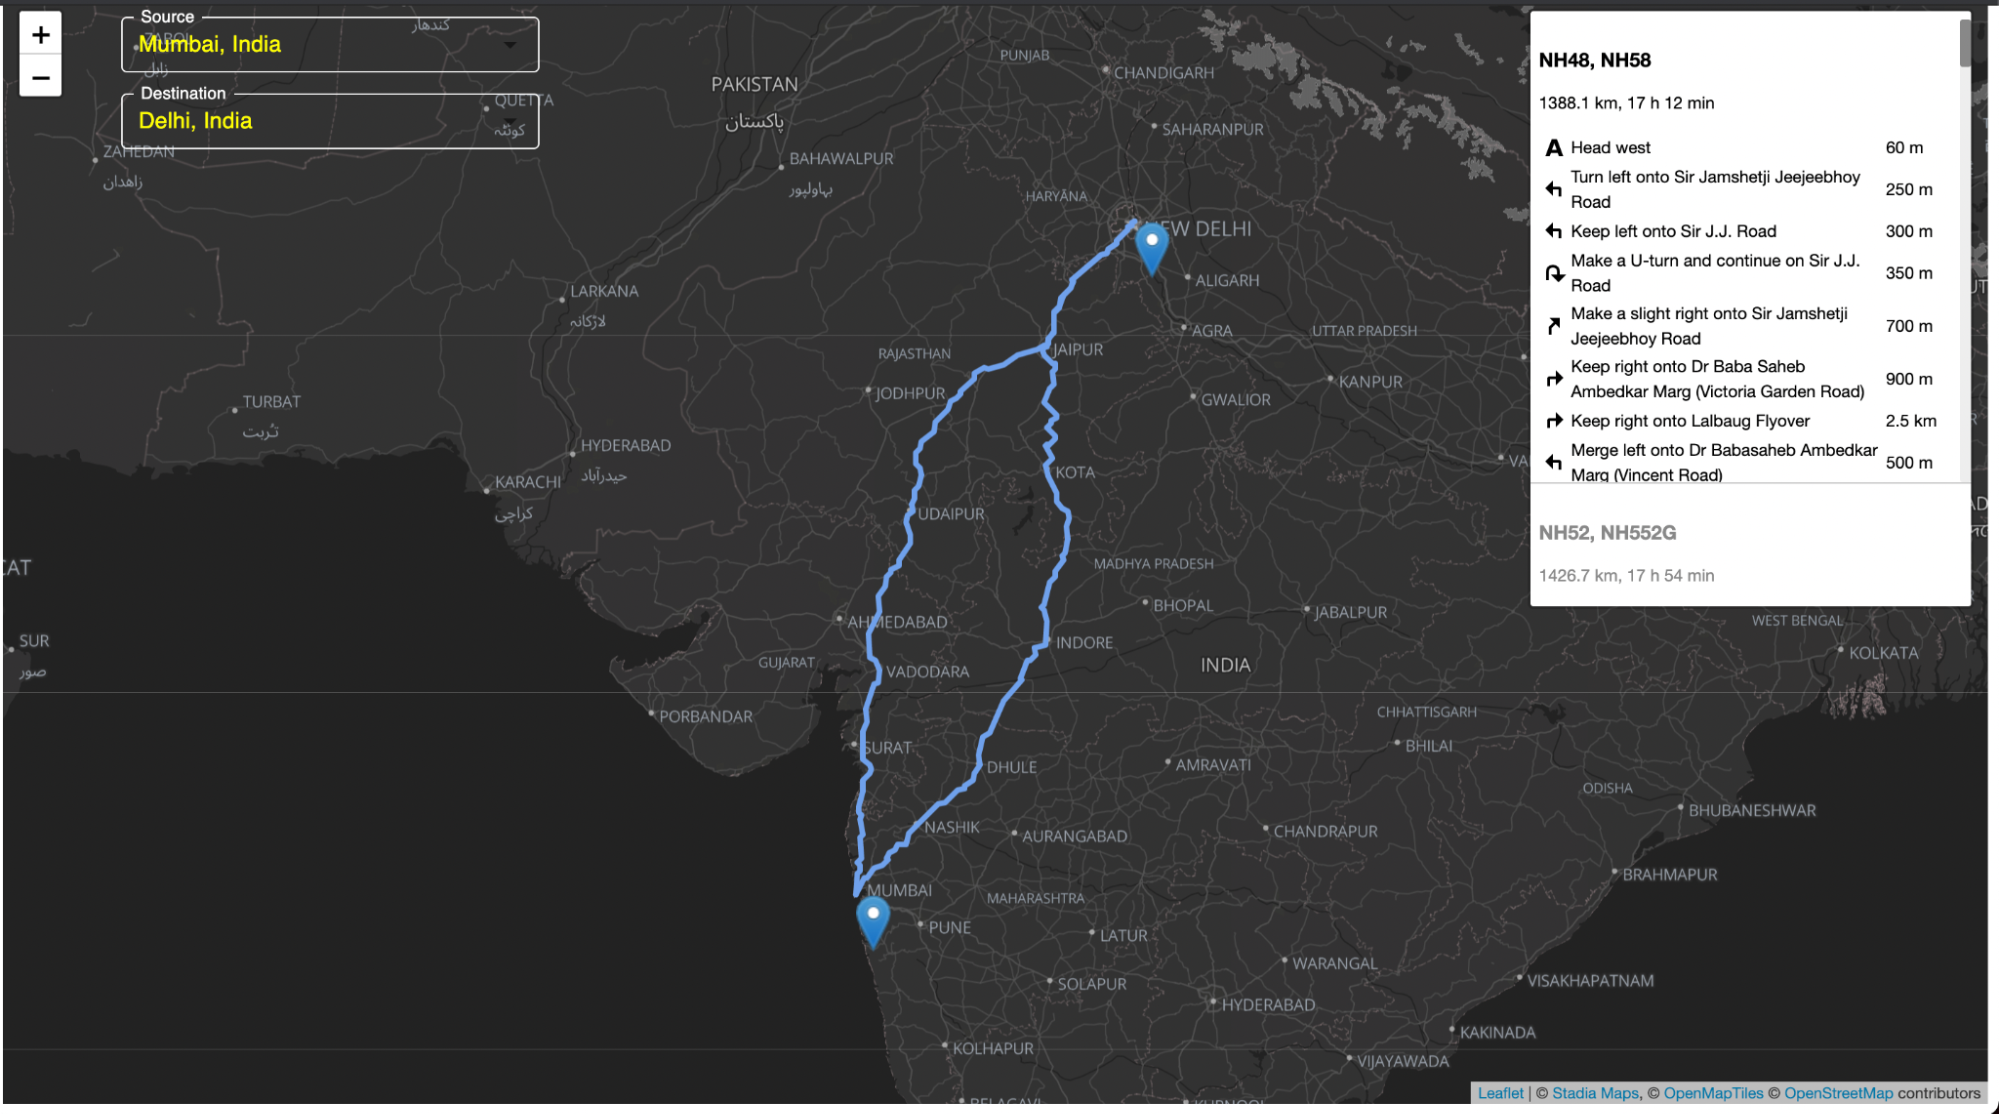
Today, we are going to see how we can add routing to our leaflet maps. This blog will show how we can make use of the leaflet maps to show the route between a source and a destination. For achieving this we will be using the Leaflet Routing Machine module.
What is Leaflet?
Leaflet is an open-source JavaScript library for developing interactive maps. Weighing just about 39 KB of JS, it has all the mapping features most developers ever need. It’s a lightweight, open-source mapping library that utilizes OpenStreetMap. It has more than 30k stars on GitHub.
What is Leaflet Routing Machine?
Leaflet Routing Machine is an easy, flexible, and extensible way to add routing to a Leaflet map. Using the default is just a few lines of code to add fully functional routing, but you can still customize almost every aspect of the user interface and interactions.
Key features of Leaflet Routing Machine include:
- Standard Leaflet control, with Leaflet, look and feel
- Routing from start to destination, with the possibility of ‘via’ points
- Add, edit and remove waypoints through both address input and using the map
- Multiple language support
- OSRM - Open Source Routing Engine is built-in
Installation:
We need to install react-leaflet in our React project. Please follow the steps provided in the following guide. Once the react-leaflet is added to our package-JSON file, we need to add a few more things to view our map correctly.
Now we need to add some CSS to our file to start using the map straight away. You can do that either by including the CSS link tag in your head, or you can simply copy-paste the CSS from the file below directly into your project(index.html):
We need to set the width and height of the .leaflet-container that the map renders itself into, otherwise it won’t be visible because the div will have a height of 0px:
Apart from the react-leaflet, we need to install a leaflet-routing-machine package as well:
And afterwards, we need to import the below files in our routing component:
Import library's CSS file:
Import library's JS file:
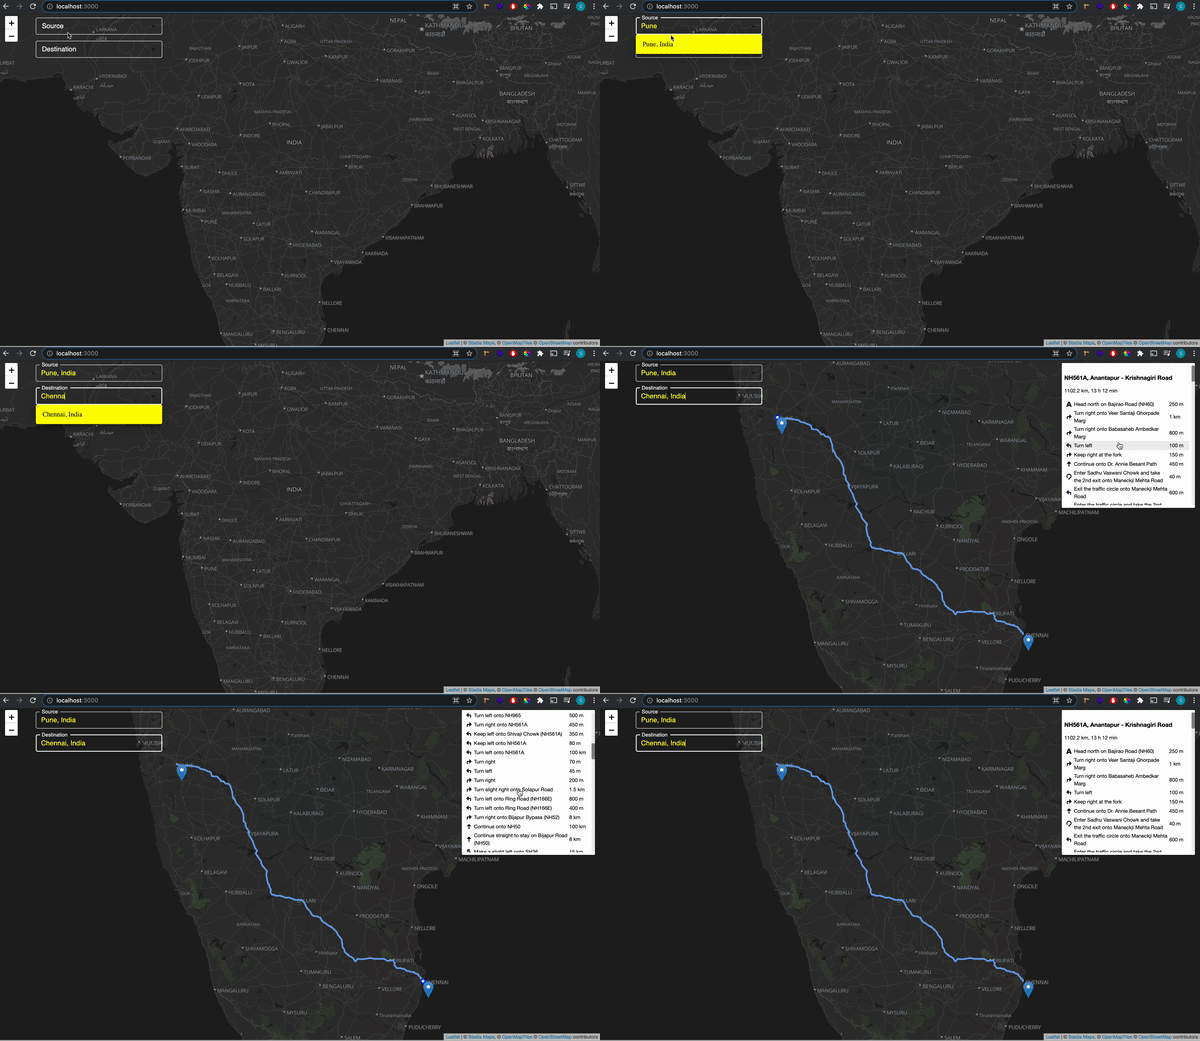
So for our current use case, we will create a simple leaflet map and add routing to it. Users will be able to enter source city and destination city, based on which it will show the routes between the two locations. Just for our understanding, our website will look like below:

Now let’s get started
First, we’ll render the leaflet map in our React app. We can do this by importing 2 components from the react-leaflet:
Once the import is done now we’ll display the map with the help of the imported component.
This will render the leaflet map in our React app. So the basic functionality of the imported components are:
MapContainer component: The Map component requires that we set a center position, which is an array containing latitude and longitude, along with the default zoom level of the map.
TileLayer component: A tile layer is a set of web-accessible tiles that reside on a server. We have added the URL and attribution to our TileLayer component.
Once the Map is loaded in our React app now we add two Autocomplete dropdown menu’s in our React app and we will create a data source containing data of all the major cities around the world as below:
Data Source sample
Dropdowns
In the above dropdowns, we are saving the value of our selected city using setSourceCity & setDestinationCity using theuseState on the onChange event in the dropdown. Once we get our selected city we will pass these values to the Routing Component as props.
Now in our Routing.js
Now in our Routing component, we will destructure the props to sourceCity and destinationCity.
Now we will use the useMap hook which will provide the Leaflet Map instance in any descendant of the MapContainer.
Then we will instantiate a new routing control with the waypoints. We will initialize the waypoints with the latitude and longitude coming from the de-structured props sourceCity and destinationCity. Then we will add that to our map.
That’s it we have added the route to our map. It’s that simple. So our final website will look like below:
Final Website

Conclusion
In this blog, we have learned how to add routing to our leaflet maps using the leaflet-routing-machine module. Also, we have developed a small use case where we can select the source city and destination city from the dropdown and it will show the route between the two cities. You can access the complete code of this tutorial here. If you would like to know more about how to build interactive maps with Leaflet and React click here.

