
.avif)
Drupal, like any open-source platform, evolves and improves through the contributions of its community.
The best part of being involved is that every effort counts, whether you're fixing bugs, writing documentation, reviewing updates, creating modules or themes, promoting Drupal, or organizing events. This article will guide you on how to contribute a module to Drupal and share it on Drupal.org.
Why and when to create a contributed module
If you notice that the CMS is missing a feature that others benefit all Drupal users, creating a contributed module can be valuable.
This is especially true if you’ve already developed a custom solution for a common problem or added features that existing modules don’t cover. By sharing your module, you help other developers facing similar challenges and expand Drupal’s functionality.
Contributing also leads to more collaboration—others can build on your work, suggest improvements, and help keep it updated with the latest Drupal versions.
It’s a rewarding way to share your expertise with the entire Drupal community, support the people who are a part of it, and promote good practices in open-source development. For more reasons to host your project on Drupal.org, visit "Why host your project on Drupal.org."
How to contribute a module : Step by Step guide
Step 1: Identify a problem and create a module for the purpose
The first step in creating a contributed module for Drupal is to thoroughly identify and understand the problem or gap in functionality that you aim to address. This involves a combination of research and analysis to ensure that your module will be both useful and relevant. Here’s a more detailed approach to this process:
- Research
Look for issues that people have encountered while using Drupal, or identify a feature that could benefit Drupal users. For instance, if multiple users ask for a specific feature or integration that isn’t currently available, this could be your chance to create a module. To find these contribution opportunities, you can explore drupal.org, community forums, and discussion boards
- Review Existing solution
Review existing modules and their documentation to understand their capabilities and limitations. Identify any gaps or areas for improvement. Review existing modules to ensure your idea is not a duplicate or already covered.
- Define Your Module’s Purpose
Clearly define the problem your module will solve or the feature it will provide. Make sure that the problem is significant enough to warrant a new module and that your solution will offer tangible benefits to users. Document the module’s functionality and objective clearly to keep your development focused and aligned with the identified needs.
By researching and engaging with the Drupal community, you can make sure your module meets a real need and offers valuable functionality. After identifying the problem and defining what your module will do, you can start creating it by following the steps in the Drupal documentation on creating modules.
Step 2: Preparing the module for drupal.org contribution
If the module you created in the last step improves the functionalities of drupal, you can go ahead with contributing the module. Ensure the module is generic and free of hardcoded configuration values. Include the following files:
- README.md: Provide detailed documentation in README.md file. This should contain an introduction , Installation guide, Post Installation configuration, Requirements, etc. For comprehensive instructions and a sample template, refer to the Drupal documentation on creating a README.md file.
- composer.json: Use this file to declare your module’s dependencies on third-party libraries. This ensures that when someone installs your module using Composer, all required libraries will be automatically downloaded and installed. For a practical template, refer to the Composer template for a Drupal 10 project. This template provides a comprehensive example of how to structure your composer.json file for Drupal projects.
- .gitignore: When there are third-party libraries included in your module, use this file to make sure that the actual third-party libraries are not included in your repository. This is because libraries should be managed by Composer and not be part of your module’s codebase.
Step 3: Create a new project in drupal.org
- Go to the Add a New Project page on Drupal.org. You need to be logged in with your Drupal.org account to create a project.
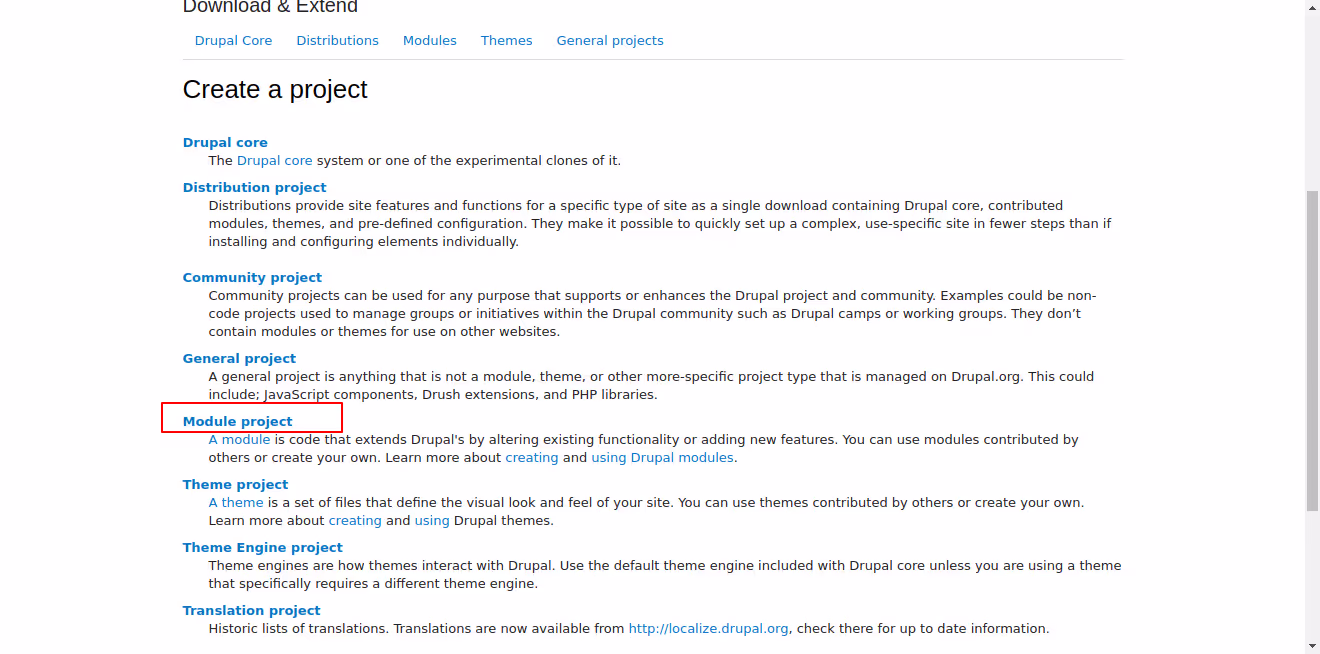
2. Choose the 'Module' project option. This specifies that you are creating a new module, as opposed to a theme, distribution, or other project types.
3. Fill Out the Project Form:
- Name *: Enter the name of your module. This should be clear and descriptive. Example: Field Display Toggle.
- Project Type *: When creating a new project on Drupal.org, you can select 'Full project' to indicate that your module is fully developed and ready for use. Sandbox projects, which were used for experimental and developmental purposes, are now deprecated. For more information on the differences between sandbox and full projects and to learn how to promote a project from sandbox to full, visit this guide on Drupal.org.
- Short Name *: Provide a machine-readable short name for your project. This is usually a lowercase version of the project name with underscores instead of spaces. Example: field_display_toggle.
- Maintenance Status *: Select the appropriate maintenance status from the options provided:
- Actively maintained
- Minimally maintained
- Seeking co-maintainer(s)
- Seeking new maintainer
- Unsupported
- Development Status *: Choose the current development phase:
- Under active development
- Maintenance fixes only
- No further development
- Obsolete
- Module Categories: Select up to three categories that best describe the functionality of your module.
- Ecosystem: If your module is part of an ecosystem (e.g., it provides plugins for Views or enhances Organic Groups), list the relevant projects here.
- Images: Upload any relevant images to showcase your module. Files must be less than 50 MB and can be of types: png, gif, jpg, jpeg.
- Replaced By: If your module replaces an older project, list the old project here.
- Description *: Write a detailed description of your module. This should include:
- Introduction and Summary: A brief introduction that summarizes the purpose and function of the module. Focus on new Drupal users. (The first 200 characters will be shown when browsing projects.)
- Features: Explain the basic functionality and unique features. Provide use cases.
- Post-Installation: Describe what users need to do after installing the module. Include configuration steps and special considerations.
- Additional Requirements: List dependencies such as other modules, libraries, or APIs.
- Recommended Modules/Libraries: Mention any modules or libraries that enhance or improve your project.
- Similar Projects: Compare your module to similar ones, highlighting what makes yours unique.
- Supporting this Module: Provide links to Patreon, OpenCollective, etc., for supporting development.
- Community Documentation: Add links to external documentation, YouTube walkthroughs, or a demo site.
- File Attachments: Upload any additional files necessary for your project (up to 1 MB, allowed file types: jpg, jpeg, gif, png, txt, xls, pdf, ppt, pps, odt, ods, odp, patch, diff, test, info, po, pot, psd).
- Supporting Organizations: Name any organizations that have supported the development of your module and describe their contributions.
- Issues *: Ensure the issue tracker is enabled for your project to manage bug reports and feature requests.
- Components *: Classify different aspects of your project (e.g., Code, Documentation, User Interface).
- Now you will be redirected to the project page. To ensure you provide all the necessary information, visit the Project Page Template for detailed guidance on what needs to be included.
Step 4: Upload source code to project in drupal.org
- In the project page created in step 3, click on the tab ‘Version Control’. Here you can find git commands for working with project’s source files.
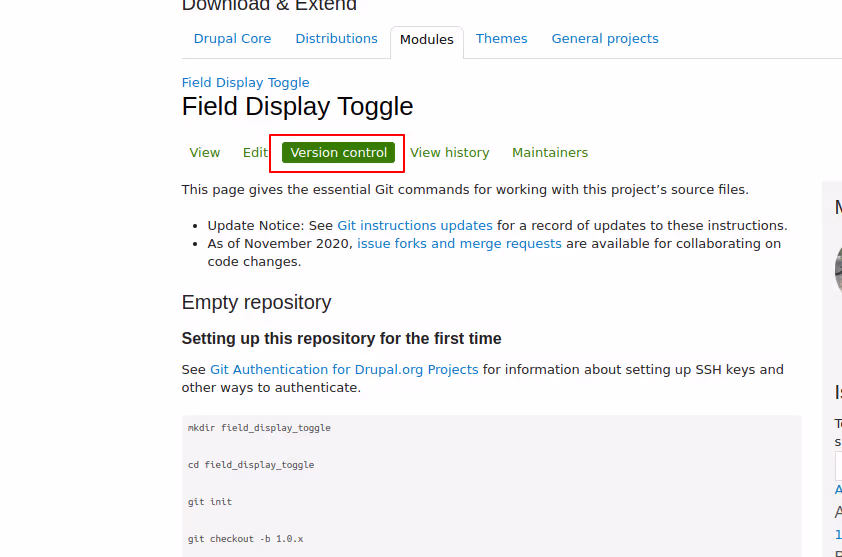
- Use the Git commands provided in the Version Control tab to clone your project's repository to your local machine. This repository is where you'll upload your module's source code.
- You can also upload code to drupal.org from your local repo, github/gitlab repo.
- After running the git push command (as per the documentation), go back to the project page in drupal.org to confirm that your code has been uploaded.
Step 5: Add automated tests and pipeline
Automated testing and continuous integration are essential for keeping your Drupal module reliable and high-quality. Setting up a pipeline with GitLab CI will automatically test and validate every change to your module. Here’s a step-by-step guide on adding automated tests and configuring a pipeline for your module on Drupal.org:
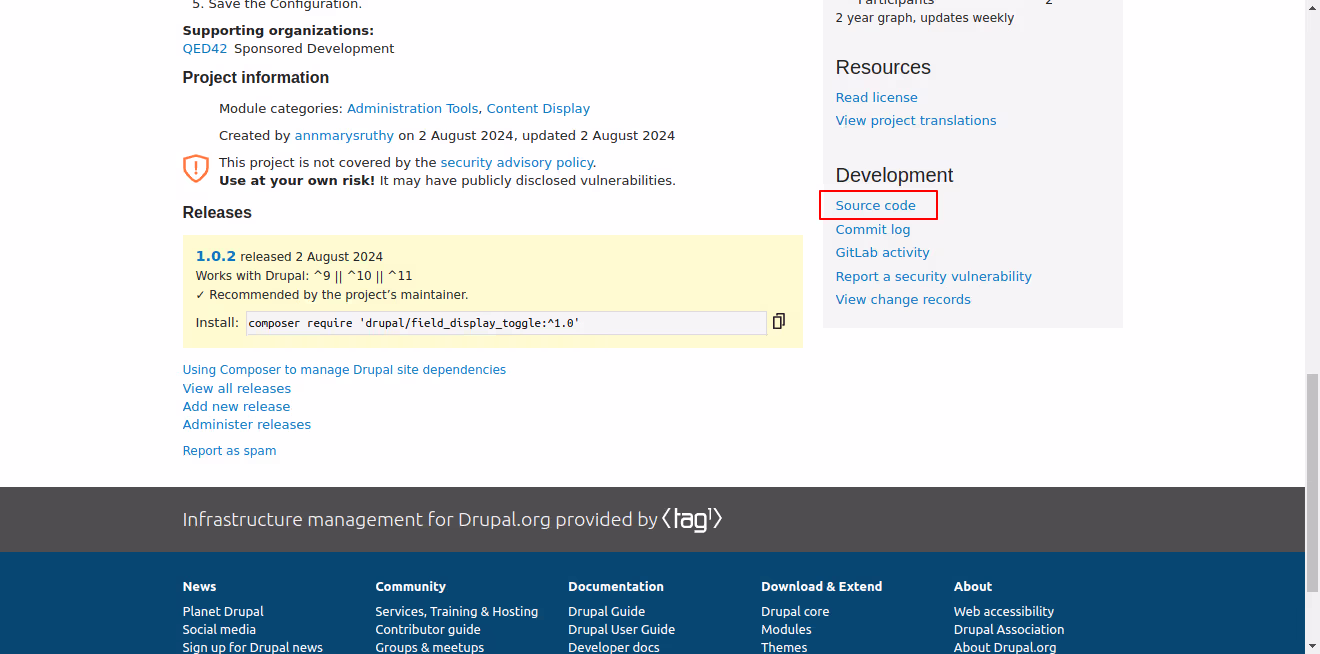
- Navigate to the Source Code Section: On your module's project page on Drupal.org, click on the ‘Source Code’ link under the development menu. This will redirect you to the project's source code repository.
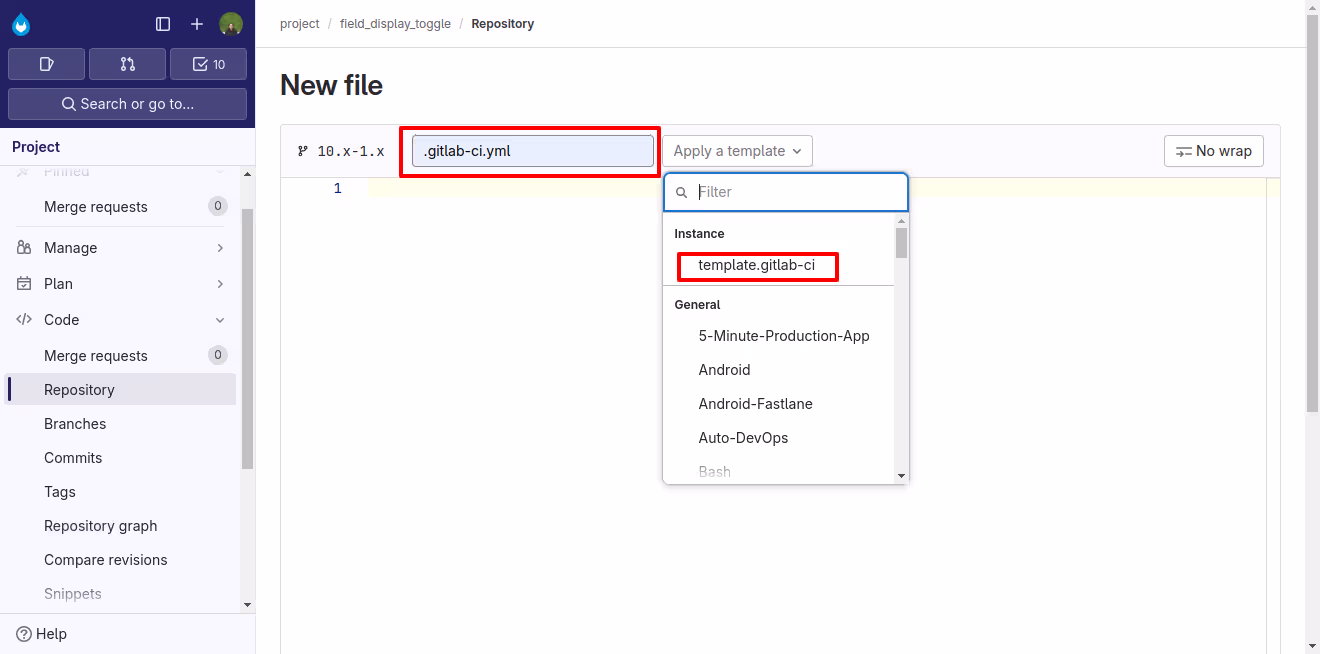
- Create a New File for GitLab CI Configuration: Click on the ‘+’ icon next to the project name and select option ‘New File’.

- Add the GitLab CI Configuration File: Add file name ‘.gitlab-ci.yml’ and now an option to select template appears. Select the option ‘template.gitlab-ci. This template provides a basic configuration that can be customized according to your needs.
- Customize the GitLab CI Configuration: The template provides a basic structure for the pipeline. You can modify this configuration to include various stages such as build, test, and deploy. For a detailed process on customizing the automated tests and pipeline, visit Guide on Gitlab CI.
- Commit the Changes: Commit the changes and now the pipeline will be executed . The pipeline will run the specified stages, including building the project, running tests, and any deployment steps you have configured.
- Running PHPUnit Tests: To integrate PHPUnit tests within this pipeline, refer to the official Drupal documentation on running PHPUnit tests. This guide provides a comprehensive overview of how to set up and run PHPUnit tests in a Drupal environment, including configuring the necessary dependencies and understanding the test output.
Conclusion
Contributing a module to Drupal.org is a great way to support the community and apart from that by creating something useful, you're helping both the Drupal community and the businesses that rely on it. It's also a chance to share your work, get feedback on it, and be part of open-source development.
Enjoy the process, knowing that your efforts make a difference to Drupal as a digital public good and benefit everyone who uses it.