Introduction
Proper execution and reporting of automation tests play a crucial role in ensuring the reliability and effectiveness of your automation testing efforts. We will learn how to configure the testng.xml file, execute automation tests using testng.xml and pom.xml, and generate comprehensive test reports.
Let's dive in!
Testng.xml configuration
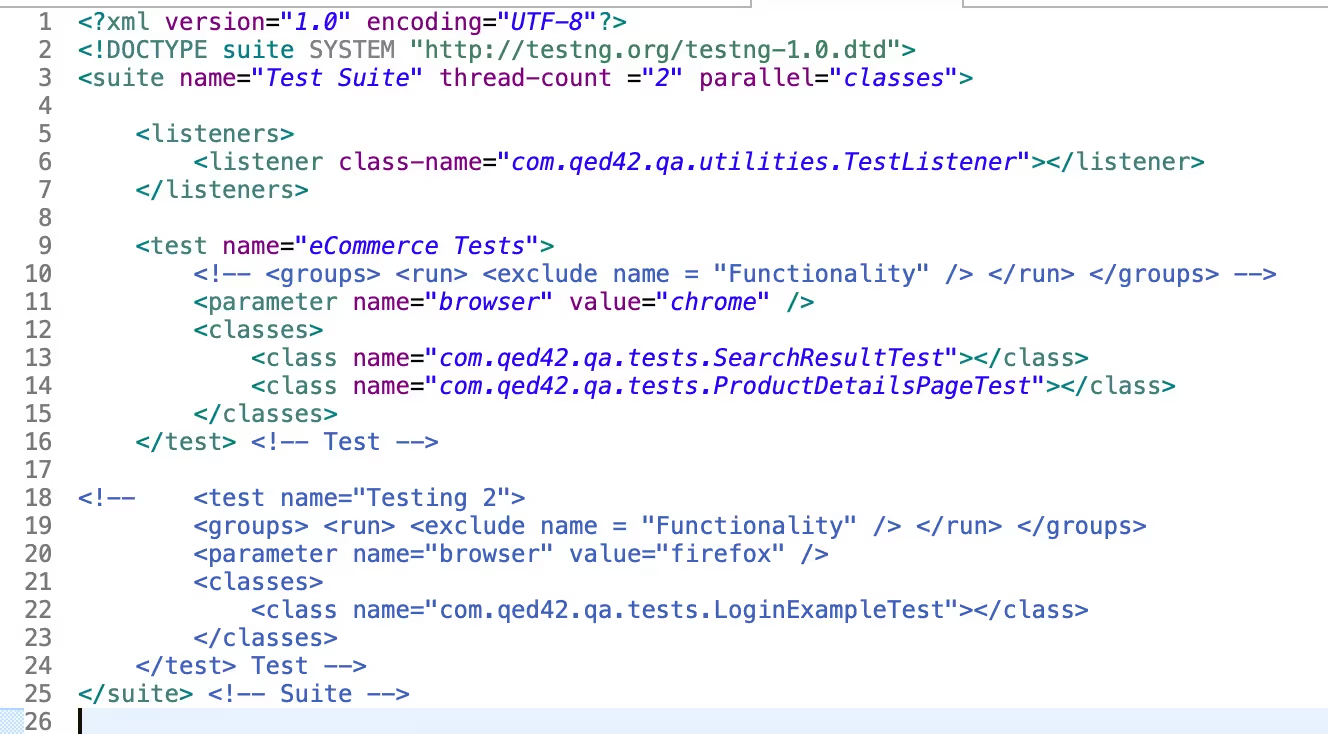
- Suite name: Update suite name as per your testing requirements. For example, if you need to run the regression tests, you can update the suite name as “Regression Suite”.
- thread-count: This attribute is used to pass the number of maximum threads to be created.
- parallel: The parallel attribute on the <suite> tag can take one of following values:
- parallel="methods": TestNG will run all your test methods in separate threads. Dependent methods will also run in separate threads but they will respect the order that you specified.
- parallel="tests": TestNG will run all the methods in the same <test> tag in the same thread, but each <test> tag will be in a separate thread. This allows you to group all your classes that are not thread safe in the same <test> and guarantee they will all run in the same thread while taking advantage of TestNG using as many threads as possible to run your tests.
- parallel="classes": TestNG will run all the methods in the same class in the same thread, but each class will be run in a separate thread.
- parallel="instances": TestNG will run all the methods in the same instance in the same thread, but two methods on two different instances will be running in different threads.
- parallel="none": TestNG will run all the tests in the non-parallel mode.
- listeners: The TestNG listens to the “TestListener” class that implements ITestListener interface. It is already added in the testng.xml file provided in the Headway. You can add more listeners that you implement in your respective project.
- test: A test is represented by <test> and can contain one or more TestNG classes.
- parameter: For any tests, you can pass a browser parameter. In case, nothing passed, then tests will run on chrome browser.
- class: A TestNG class is a Java class that contains at least one TestNG annotation. It is represented by the <class> tag and can contain one or more test methods. You can add classes of which tests are to be run.
Automation Test Execution using testng.xml
- Configure testng.xml:
- Modify the existing testng.xml file to define the automation test suite(s) and their configurations.
- Specify the test classes, test methods, or groups to include or exclude from the test execution.
- Set up any necessary test parameters, test data, or test environment configurations.

Once the testng.xml file is updated, run tests using testng.xml.
- To run a complete test suite: Run the test by right clicking on the TestNG xml file and select Run As -> TestNG Suite.
- To run individual class containing tests: Run the test by right clicking on the test class file and select Run As -> TestNG
You can refer to section 3.4. Updating the existing testng.xml of Headway user guide to get more information on how to update testng.xml using different parameters.
Build and Execution
Automation test execution using testng.xml and pom.xml involves utilizing TestNG and Maven as the tools for configuring and running tests. The Headway includes a build automation file pom.xml that defines the project dependencies and build configurations. Automated tests can be executed using a build tool Maven, or through an integrated development environment (IDE) that supports running tests.
Test Execution Workflow using testng.xml and pom.xml :
- Configure pom.xml:
- In the pom.xml file, the TestNG plugin configuration is already added to enable automation test execution using Maven Surefire plugin.

- Configure the TestNG plugin to point to the location of the testng.xml file.
- Set up additional configurations such as test output directories, test failure thresholds, and test report generation options.
- Run Tests:
- Open a command-line interface or an integrated development environment (IDE) that supports Maven.
- Navigate to the project directory containing the pom.xml file.
- Execute the test
- When using terminal : Execute the Maven test command (mvn test) to trigger the test execution.
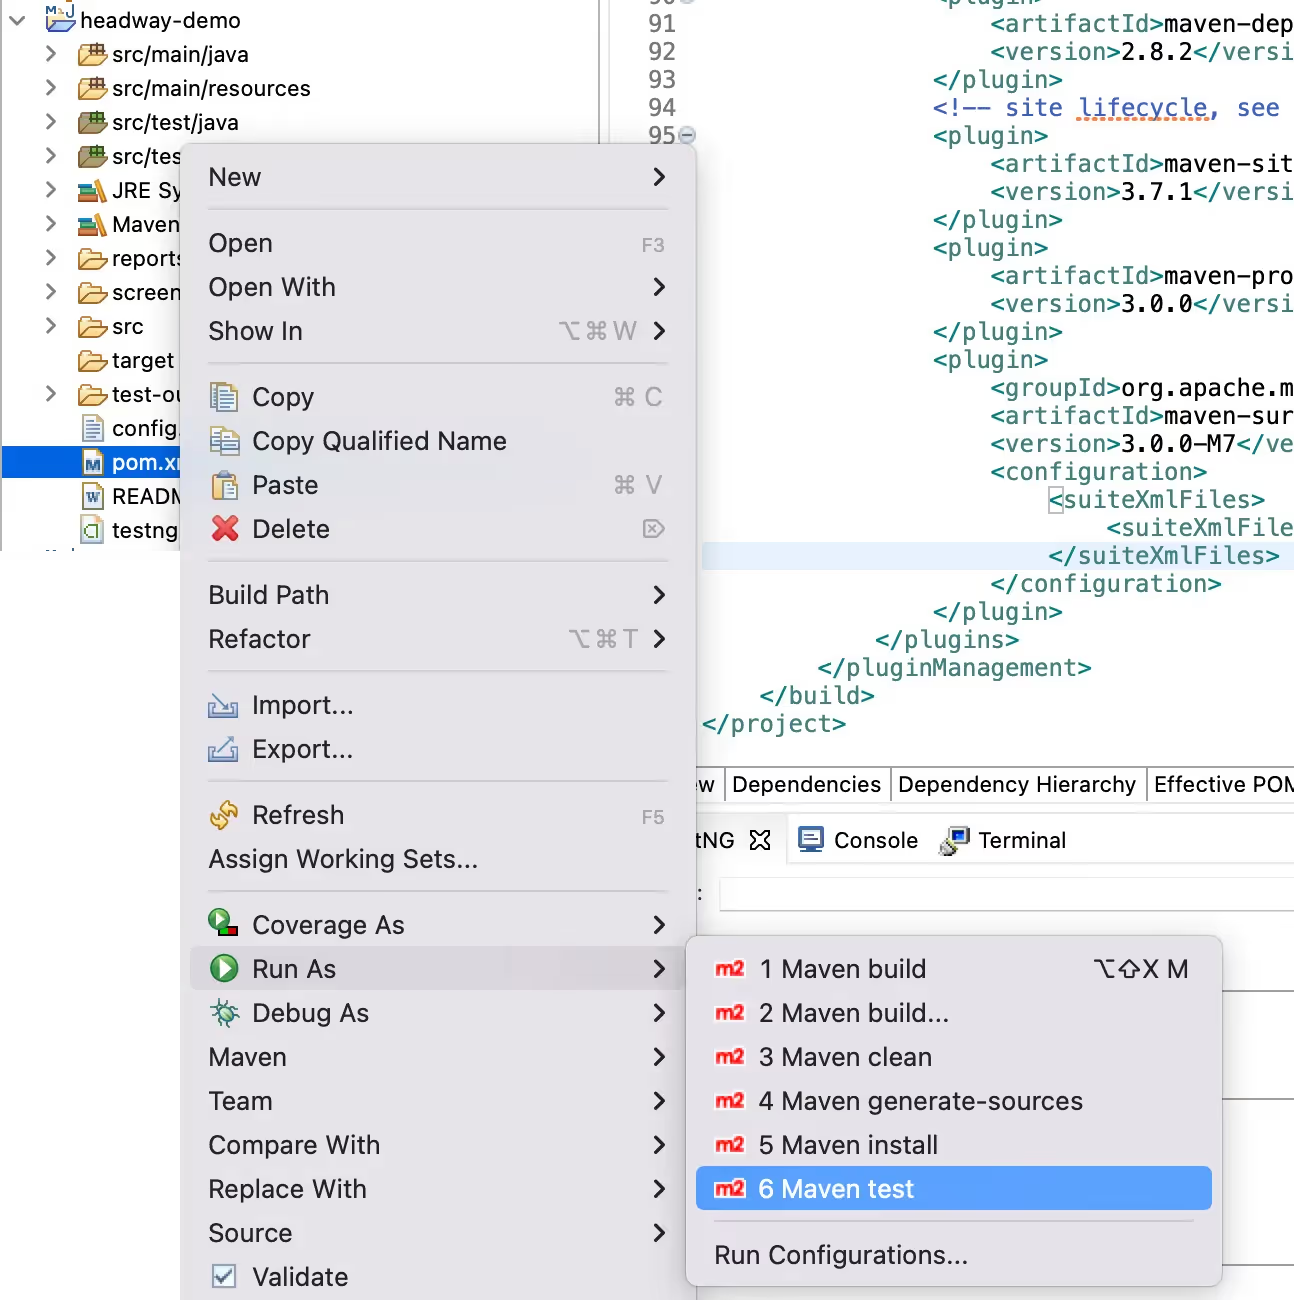
- When using IDE Eclipse : Right-click on POM.xml -> Run -> Maven test.

- Maven reads the pom.xml file, identifies the TestNG plugin configuration, and runs the tests according to the specified testng.xml file.
Test Report Generation
- After the test execution completes, TestNG generates a test report based on the results.
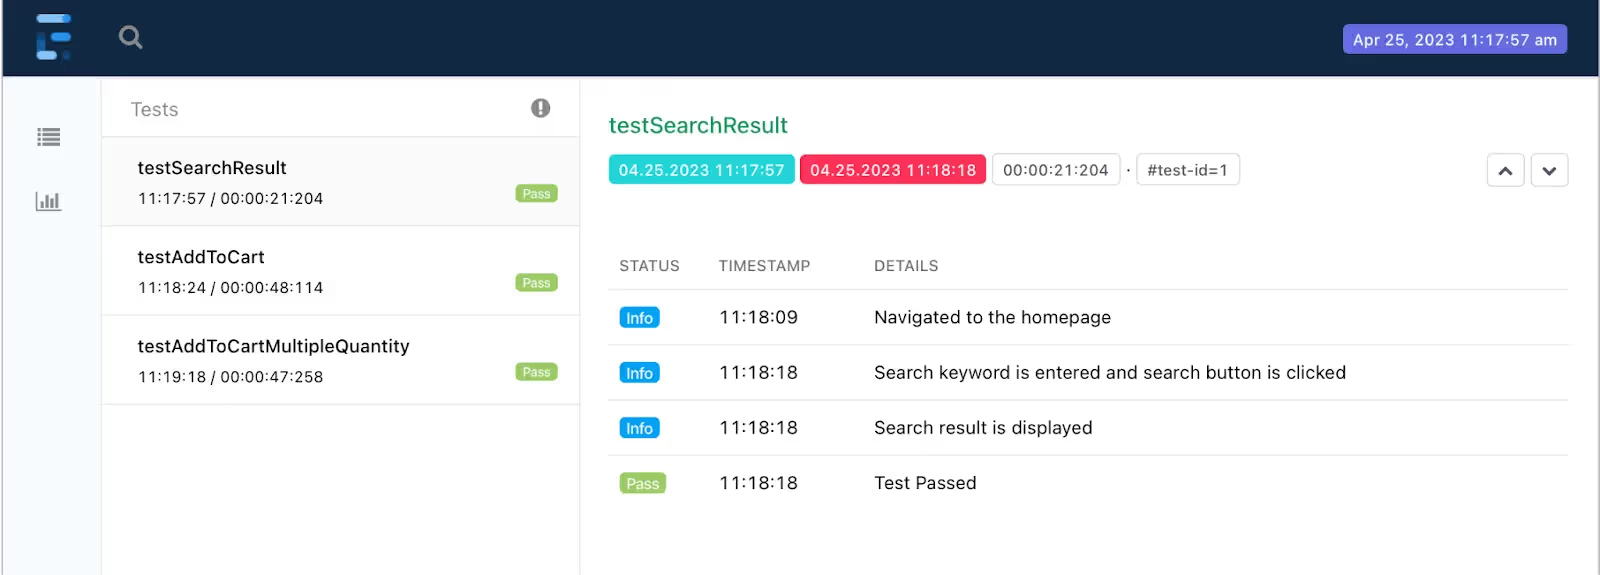
- Test report is created in HTML format and provides detailed information about the executed tests, including test status, duration, error messages, and stack traces.
- The test report can be accessed using below steps
- Open “/reports/Report.html” report file and check the test results.
- Check the screenshot files are captured under this “screenshots” directory for failed tests.

Conclusion
In conclusion, effective test execution and reporting are vital components of a successful testing strategy. By properly configuring the testng.xml file and utilizing the power of Maven and TestNG, you can streamline your test execution process and obtain detailed test reports. These reports provide valuable insights into the test results, including test status, duration, error messages, and stack traces. By leveraging the information provided in the reports, you can identify and address any issues or failures in your tests promptly.

