

Strapi is a powerful CMS that offers a variety of features out of the box, along with a robust plugin marketplace. However, there are times when you might need a custom solution to meet specific project requirements. Fortunately, Strapi makes it easy to extend its functionality through custom plugins. Some common use cases for this include creating a custom authentication provider, integrating with third-party APIs, or enhancing the admin panel's search functionalities.
In one of our projects, we needed to implement custom functionality, so we turned to the documentation and available examples. While there were plenty of examples, the documentation felt scattered and didn’t provide a clear, cohesive guide on how to get started with plugin development.
In this tutorial, we will walk through the steps of creating a simple plugin in Strapi. Our goal is to fetch configuration data from the plugin and display it on the admin panel.
Strapi plugins are structured in two parts: the backend (server folder) and the frontend (admin folder). We will create custom routes and expose APIs that can be accessed from Strapi’s frontend to retrieve data and trigger various events.
Step 1: Setting up Strapi
Before starting, ensure that you have Strapi installed and running. If you don't have it installed yet, you can create a new Strapi project with the following command:
yarn create strapi-app test-project-1 --quickstartPlugins in Strapi are located in the ./plugins directory of your project. To create a new plugin, use the CLI command below:
yarn strapi generate pluginAfter running this command, enter the desired plugin name. A new folder will be generated inside the /src/plugins/<plugin-name> directory.
This folder will consist of two subfolders: admin (for the UI, built with React.js) and server (for backend logic like routes, controllers, and services).
Note: Strapi uses a design system for its UI components, which you can explore here.
Step 2: Enabling the Plugin
To enable the plugin, navigate to the config/plugins.js file and add the following configuration:
module.exports = () => ({
    'test-plugin': {
      enabled: true,
      resolve: './src/plugins/test-plugin',
    },
});
This will enable the plugin and make it available in the Strapi admin panel. Once this is done, run the following command:
yarn run develop -- --watch-adminThen, open http://localhost:1337/admin/ in your browser, and you should see your plugin listed in the sidebar.
Step 3: Adding configuration data
To display configuration data in the Strapi admin panel, we need to modify the config/plugins.js file. Plugins can have a config property where custom configurations can be defined and accessed throughout your plugin.
For example, let's add a configuration object to our my-plugin entry in the config/plugins.js file.
module.exports = () => ({
'test-plugin': {
enabled: true,
resolve: './src/plugins/test-plugin',
config: {
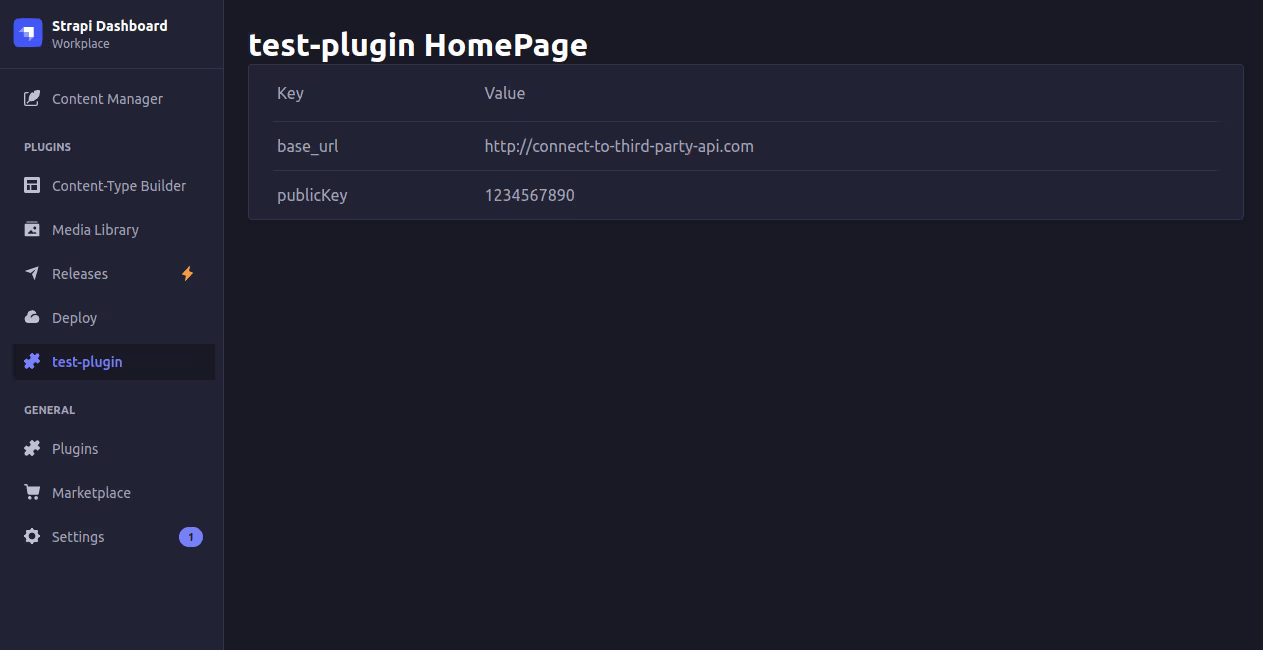
base_url: 'http://connect-to-third-party-api.com',
publicKey: '1234567890',
},
},
});Step 4: Accessing configuration data via API
Step 4.1: Create a Route
First, let's create a route to fetch the configuration data. Open src/plugins/my-plugin/server/routes/index.js and add the following route definition:
module.exports = [
    {
        method: 'GET',
        path: '/',
        handler: 'myController.index',
        config: {
            policies: [],
        },
    },
    {
        method: 'GET',
        path: '/get-configs',
        handler: 'myController.configs',
        config: {
            policies: [],
        },
    },
];
Step 4.2: Create a Controller
Now, create a controller that handles the route we just defined. Go to src/plugins/my-plugin/server/controllers/my-controller.js and add this function:
'use strict';

module.exports = ({ strapi }) => ({
    index(ctx) {
        ctx.body = strapi.plugin('test-plugin').service('myService').getWelcomeMessage();
    },

    configs(ctx) {
        console.log('called configs');
        ctx.body = strapi.plugin('test-plugin').service('myService').getConfigs();
    },
});
In this example, we're using the strapi.plugin() method to access the plugin's services, such as myService.
Side Note - Strapi provides several helper functions within the controller. For example, using strapi.plugin() and passing the plugin's name as a parameter, you can access the plugin’s services, middleware, and other data. To call a specific service, use the strapi.plugin('plugin-name').service('serviceName') method. The service name should match the file name in the services folder, using camelCase.
For instance, if the service file is named user-authentication-aws.js, you would access it with strapi.plugin('test-plugin').service('userAuthenticationAws').
Note: When generating a plugin, Strapi automatically creates key files such as the controller (my-controller.js) and service (my-service.js) files under the server folder
Step 4.3: Create a Service
Next, define the service that the controller is using. In src/plugins/my-plugin/server/services/my-service.js, add the following:
'use strict';

module.exports = ({ strapi }) => ({
    getWelcomeMessage() {
        return 'Welcome to Strapi 🚀';
    },

    getConfigs() {
        return strapi.config.get('plugin.test-plugin');
    },
});
Step 5: Displaying data in the admin panel
Step 5.1: Fetch Configuration Data
Now that the backend is set up, let's display this configuration data on the Strapi admin panel. Open the src/plugins/my-plugin/admin/src/pages/HomePage/index.js file and modify it as follows:
import React, { useEffect, useState } from 'react';
import pluginId from '../../pluginId';
import { useFetchClient } from '@strapi/helper-plugin';
const HomePage = () => {
const [configs, setConfigs] = useState({});
const client = useFetchClient();
useEffect(() => {
client
.get(`/my-plugin/get-configs`)
.then((response) => {
setConfigs(response.data);
})
.catch((error) => {
console.error('Error fetching configs:', error);
});
}, [client]);
return (
<div>
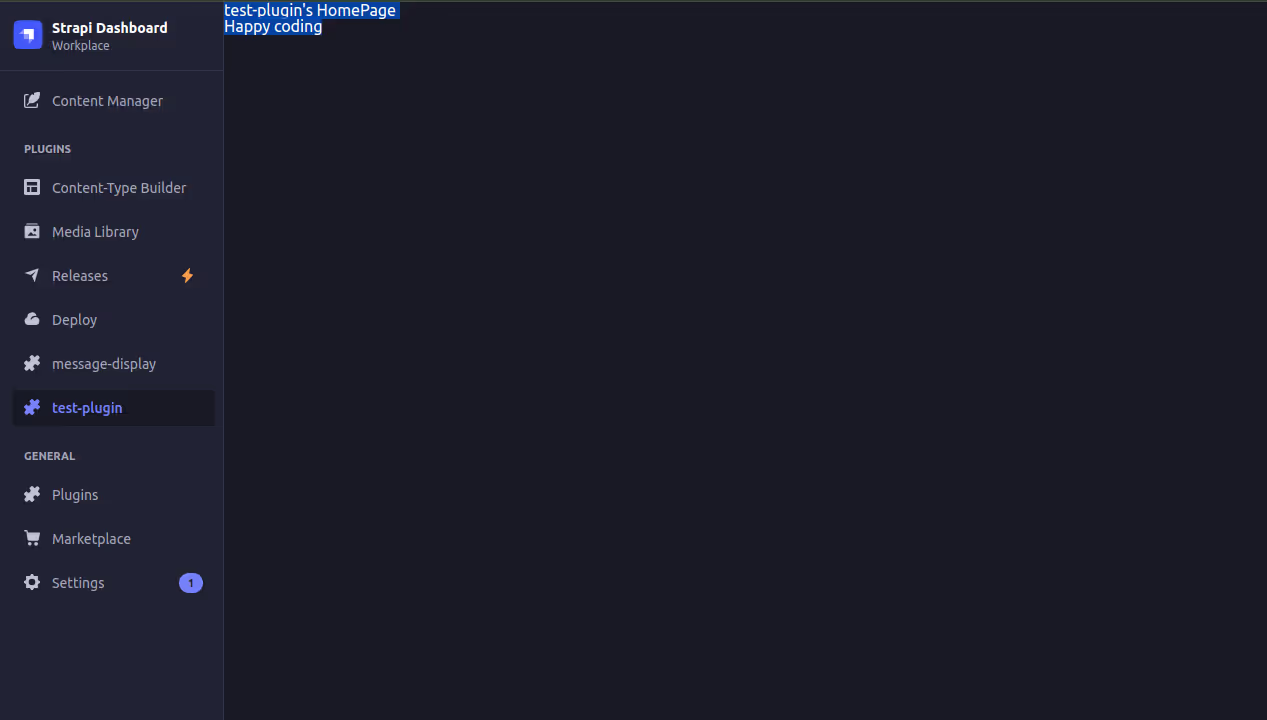
<h1>{pluginId} HomePage</h1>
<p>Configs: {JSON.stringify(configs)}</p>
</div>
);
};
export default HomePage;
This component makes a GET request to the /get-configs route we defined earlier and displays the configuration data.
Step 5.2: Beautify the UI
To make the UI more presentable, we can utilize Strapi's design system components. Update the HomePage component as follows:
import React, { useEffect, useState } from 'react';
import pluginId from '../../pluginId';
import { useFetchClient } from '@strapi/helper-plugin';
import { Box, Tbody, Thead, Typography, Table, Tr, Th, Td } from '@strapi/design-system';

const HomePage = () => {
    const [configs, setConfigs] = useState({});

    const client = useFetchClient();

    useEffect(() => {
        client.get(`/test-plugin/get-configs`).then((response) => {
            setConfigs(response.data);
        });
    }, []);

    return (
        <Box padding={6}>
            <Typography variant="alpha">{pluginId} HomePage</Typography>

            <Table colCount={2}>
                <Thead>
                    <Tr>
                        <Th>Key</Th>
                        <Th>Value</Th>
                    </Tr>
                </Thead>
                <Tbody>
                    {Object.keys(configs).map((key) => (
                        <Tr key={key}>
                            <Td>{key}</Td>
                            <Td>{configs[key]}</Td>
                        </Tr>
                    ))}
                </Tbody>
            </Table>
        </Box>
    );
};

export default HomePage;
Now, the configuration data will be displayed in a table format using Strapi's design system components.
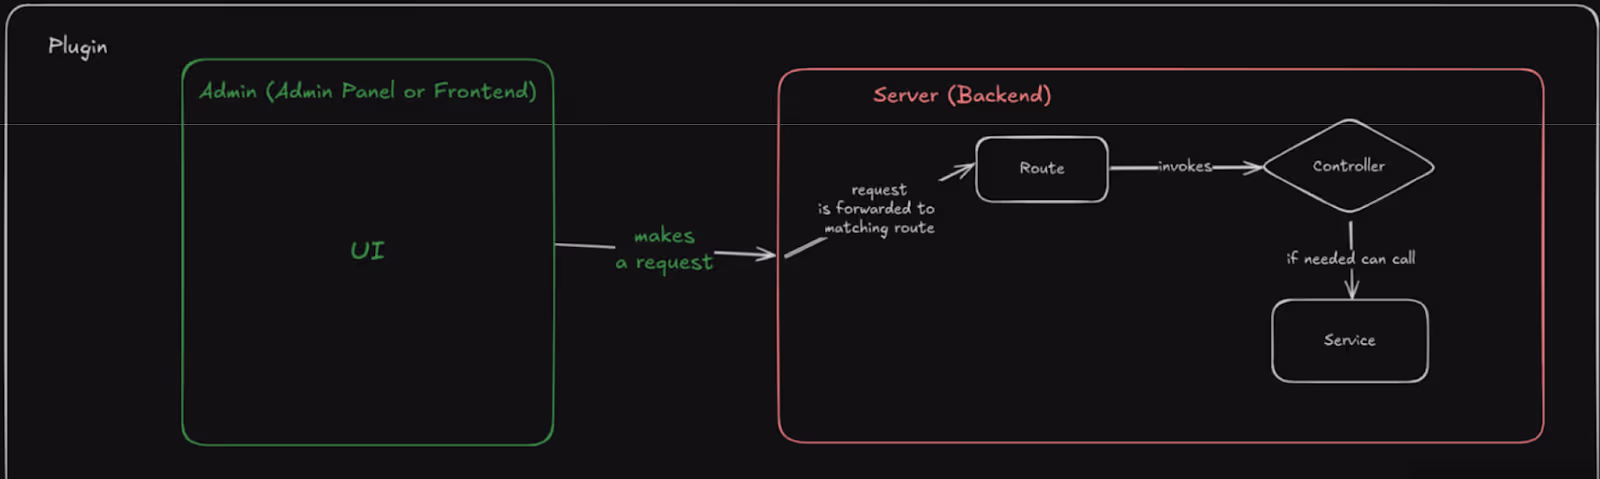
Recap - Plugin request flow in Strapi
To help visualize the plugin flow, the diagram below outlines how a request from the UI is processed in Strapi:
- UI Interaction: A user action in the admin panel or frontend triggers a request.
- Route Matching: The request is sent to the server, where it is routed to the corresponding route handler.
- Controller Invocation: Once the route is matched, the controller associated with it is invoked.
- Service Call: If necessary, the controller can call a service to handle specific logic.
- Response: After processing, the response is sent back to the UI.
This flow demonstrates how requests move from the UI to the backend, invoking routes, controllers, and services within a Strapi plugin.
Conclusion
In this blog post, we've seen how to create a basic plugin in Strapi, add a custom configuration, and display that configuration data in the Strapi admin panel. This is just the start—there's much more you can do by extending your plugin with additional functionality and UI elements!
For more information on Strapi plugins, refer to the official documentation.
Happy coding!