What is SSO
Single Sign-On (SSO) is an authentication process during which a user is provided access to multiple applications and/or websites by employing a single set of login credentials (such as username and password).
This prevents the necessity for the user to log in and out separately into the various applications. Single Sign-On (SSO) addresses the challenge of maintaining the credentials for every application separately, streamlining the method of signing-on without the need to re-enter the password. SSO is a crucial aspect of the many Identity and Access management (IAM) and security control solutions.
When a user signs into a service with their SSO login, an authentication token is created and stored either in their browser or in the SSO solution’s servers. Any app or website the user subsequently accesses will check with the SSO service, which then sends the user’s token to confirm their identity and provide them with access.
Architecture
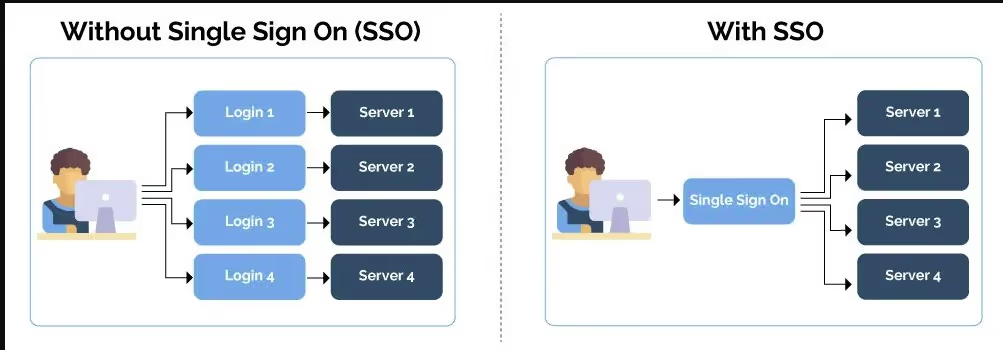
Image by : Diego Pozag
SSO Workflow

Image by : Manish Harsh
Workflow of SSO in Drupal
- User requests access to their desired website, That website is from the Service Provider.
- The APP/website (Service Provider) redirects the SSO request to Identity Provider for authentication.
- The user signs in with their Identity Provider credentials.
- The Identity Provider sends back the Single Sign-On Response to the Service Provider.
- On receipt of the SSO Response, the user is granted the access to log in and access the resource or application.
- Now the user can access all the other applications/websites from the Service Provider which are configured for SSO-Single Sign-On
Drupal as IDP and SP
1) Drupal as a SAML SP : Allow your users to login into your Drupal site using their IDP ( Identity Provider ) Credentials.
2) Drupal as a SAML IDP: Allow your users to login to any SAML complaint application using their Drupal site credentials.
Guide for Drupal Single Sign On (SSO) using Drupal 9 as Identity Provider (IDP) and Service Provider (SP)
Drupal IDP Modules used for SSO
Requirements before initiating SSO in Drupal
- For Drupal as IDP , If you have a requirement of mapping the user data between SP and IDP drupal sites or need multiple SPs login then you have to use the Paid version of module where cost can be found here.
- To get a paid version of the module you can contact info@xecurify.com or call on +1 978 658 9387 (US) and +91 97178 45846 (India) for a trial of 7 days or more.
- Here I have demonstrated a paid version of the IDP module.
Configure SSO module in Drupal as IDP
- To install free version using composer and Enable it using drushsome text
- composer require drupal/miniOrange_saml_idp
- drush en miniOrange_saml_idp
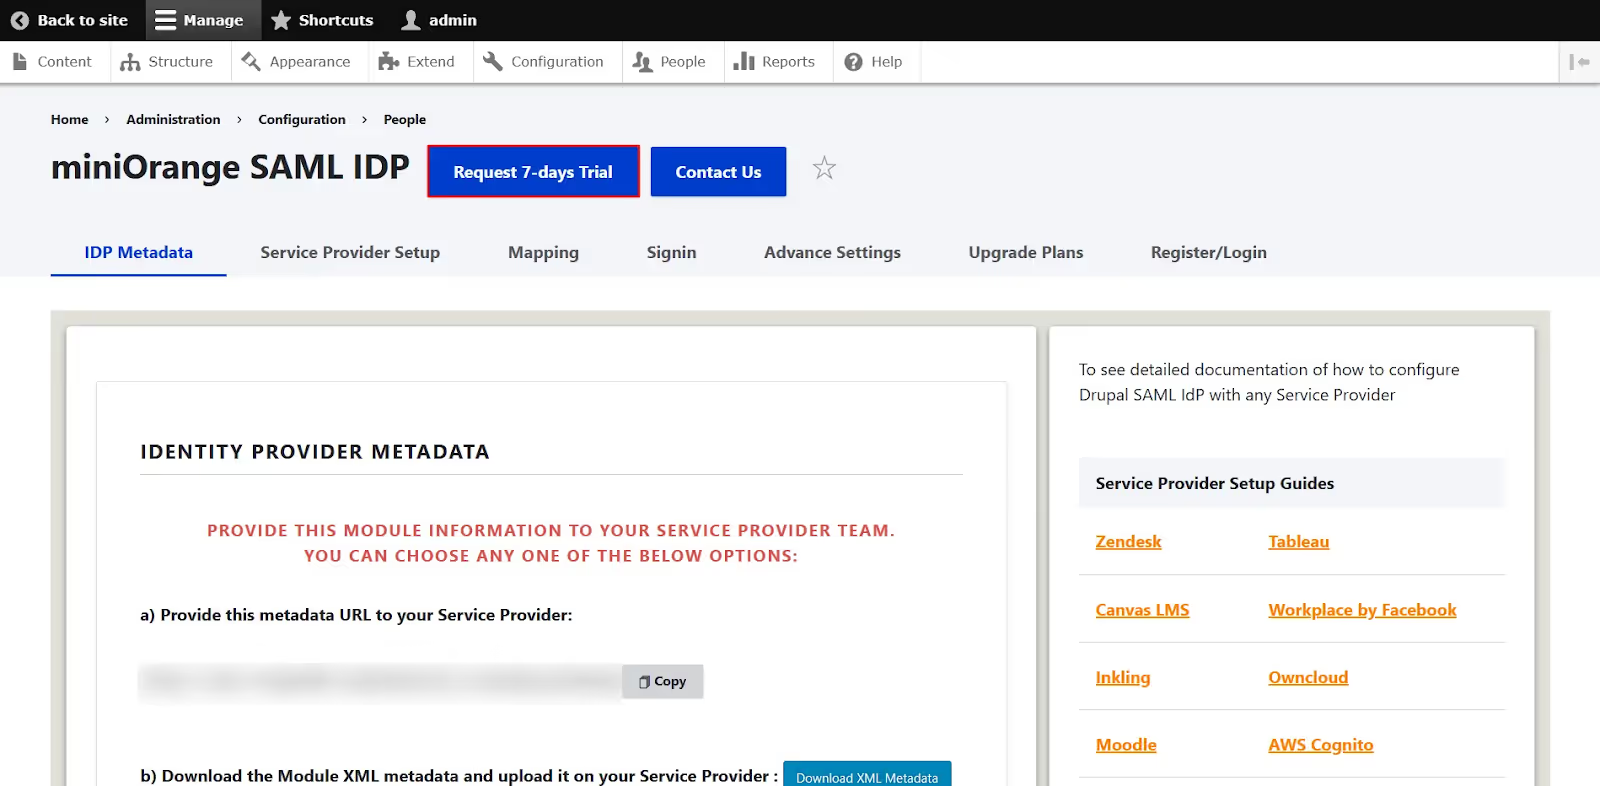
- In case of the paid version of the module create an account here or you can directly install free version of module and Go to the miniOrange SAML IDP module configuration and click onRequest 7-days Trial button.
- Enter your email, number of users, service provider name, and any use case specific requirement. Click on the Submit button.
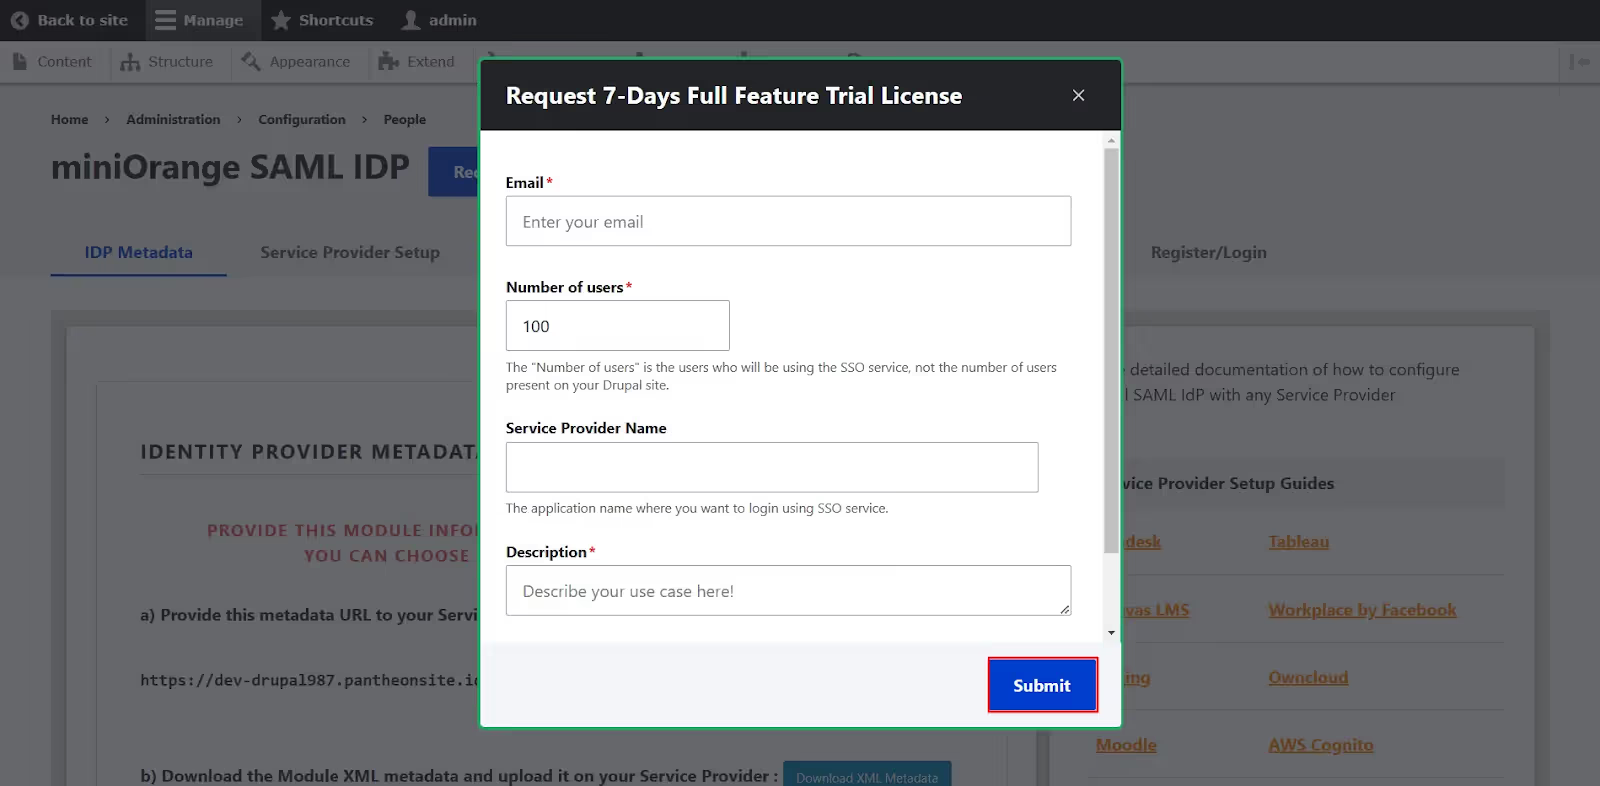
- Once you have submitted the request, You will receive mail from above listed contact details with the module's zip folder and with further guidelines of installation.
- After downloading and enabling the licensed version of the module Go to the configuration of the module. (/admin/config/people/miniOrange_saml_idp/customer_setup).
- It will ask for login details and license key , Enter them and the below page will be shown.
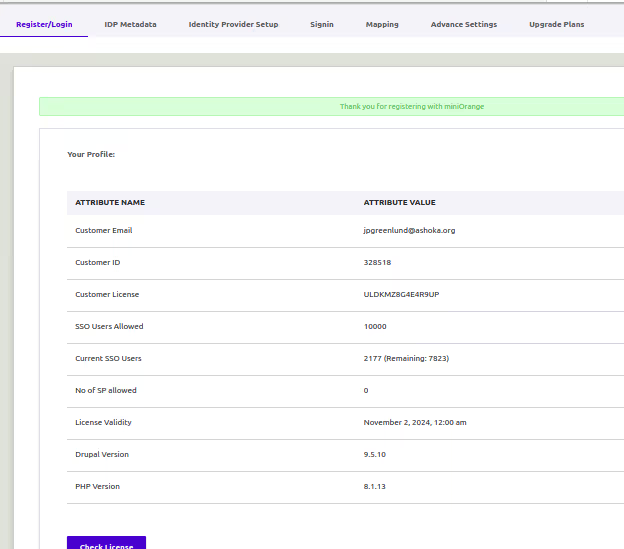
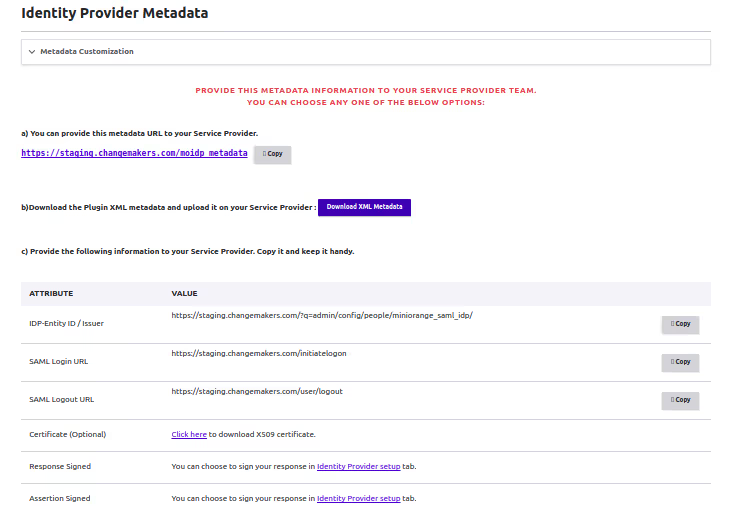
- Go to the IDP metadata tab (admin/config/people/miniOrange_saml_idp/sp_setup). You can download your IDP metadata to share with SP site for setting up connection.
- Go to Identity provider Setup tab (admin/config/people/miniOrange_saml_idp/idp_setup)
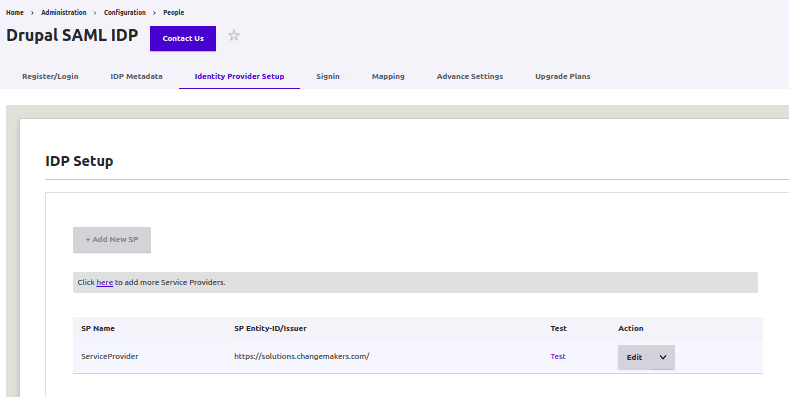
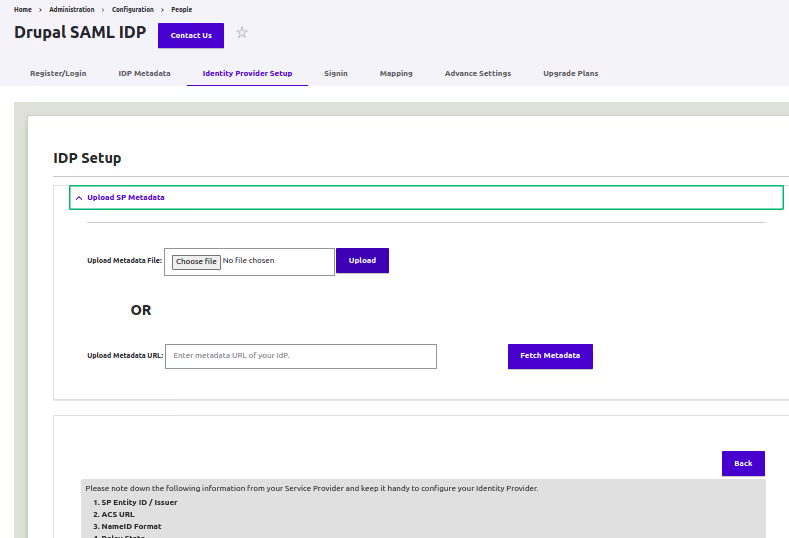
- Click on ‘Add new SP’ button and upload SP metadata over there and save .(once you setup Drupal SP site you can download SP metadata from the SP site)
- On clicking Save you can test the configuration if it works or not by clicking Test here.You should be redirected to SP site directly without login.
- If you want to redirect to a specific page of SP site you can update your Login initiated URL by adding &RelayState=<URL to which the user is to be redirected> at the end of URL.
- Login initiated URL can be found from here (admin/config/people/miniOrange_saml_idp/signon_settings)
- For eg: https://my.idpsite.com/saml_user_login?sp=ServiceProvider&RelayState=https://my.spsite.com/about-us
- Now this URL can be used anywhere in the IDP site to initiate SSO login
- By default IDP only send email of user but additional information can be passed on to SP via XML using Mapping feature (admin/config/people/miniOrange_saml_idp/Mapping)
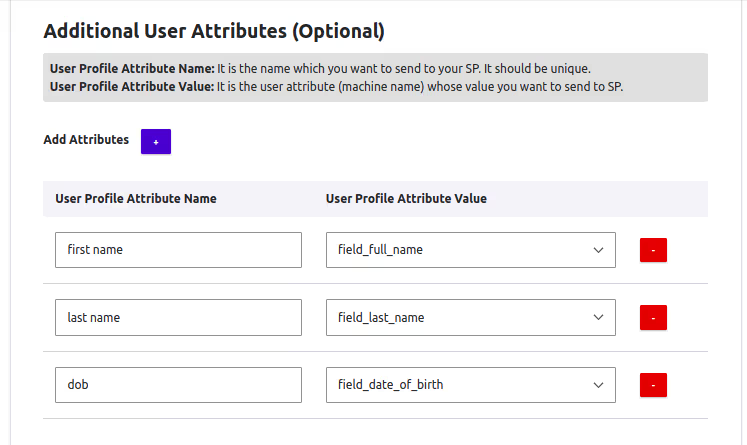
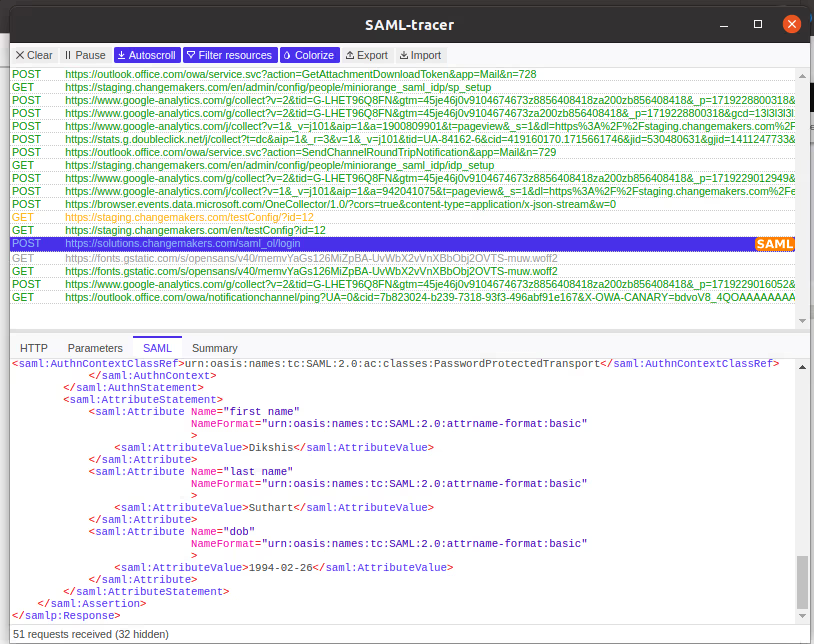
- So here first name,last name and dob string will store values of drupal idp user and send them to SP site. SP site should have this same string names for mapping correct user values.
- Using SAML tracer we can identify which values are being passed while login so for testing purposes it is better to open SAML tracer while testing SSO and check correct values are passed in tracer or not.
Notes:
- Make sure that your site does not have any login or logout redirection related module (eg: Login Destination) or any custom redirect for login/logout as they will conflict with this setup.
Configure miniOrange SP module Settings in Drupal
- Composer require drupal/miniOrange_saml
- Go to the Drupal site and run the update script using this drush updb
- Install the module: drush en miniOrange_saml
- Configure the module at /admin/config/people/miniOrange_saml/idp_setup and download your SP site meta data which will need in setting up IDP site
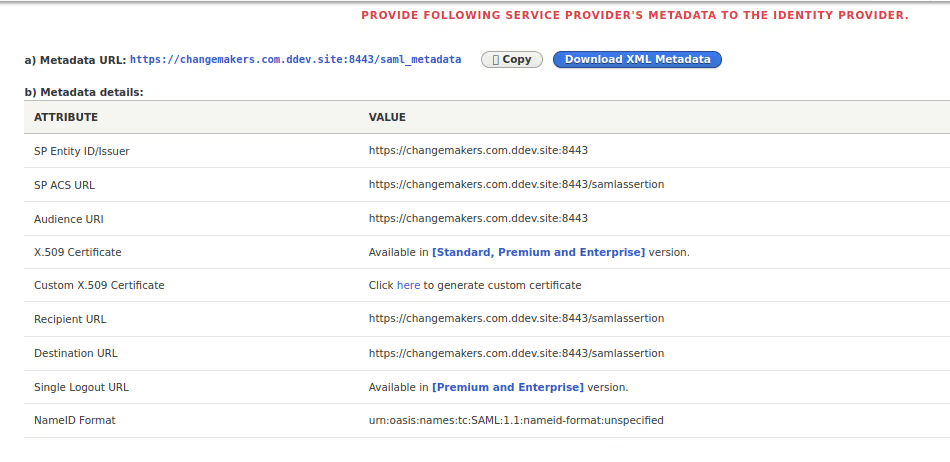
- Go to admin/config/people/miniOrange_saml/sp_setup and upload IDP site metadata

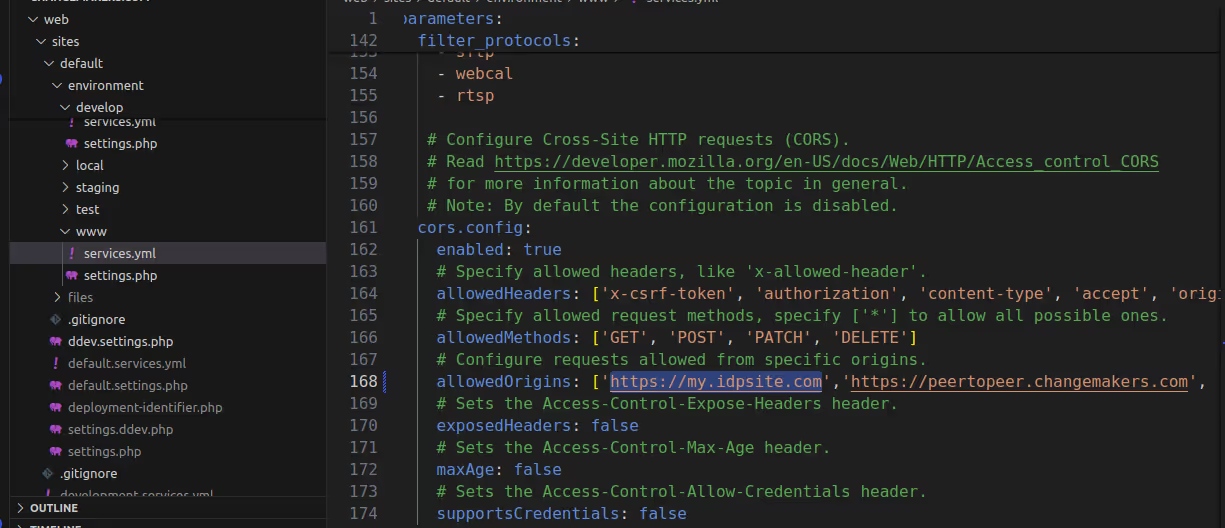
- Make sure in your site’s service.yml has allowed URL of IDP site as shown below:
allowedOrigins: ['https://my.idpsite.com']
Testing Tools
We will use the following tool to debug our SAML request as parameters are properly being transmitted from IDP to SP or vice-versa.
- SAML Tracer for Mozilla Firefox.
- SAML Tracer for Google Chrome.

.avif)