

Visual Studio Code is a popular, lightweight, and open-source code editor that provides a wide range of features for coding, debugging, and version control. One of the most powerful features of VS Code is its integration with Git, a popular version control system. In this blog, we'll explore how to use Git in VS Code, covering the basics of Git and how to perform common Git operations within the VS Code environment.
How to set up Git in VS code
To use Git and Github in VS Code, you first need to install Git on your system. Once done, sign into VS Code with your GitHub account by clicking on the Account button at the lower right side, then click on the “Sign in to sync settings” button.
This will redirect you to your browser where you can click on the “Authorize visual-studio-code” button. After this, you can clone repositories from GitHub in VS Code.
Open Git repository in vs code
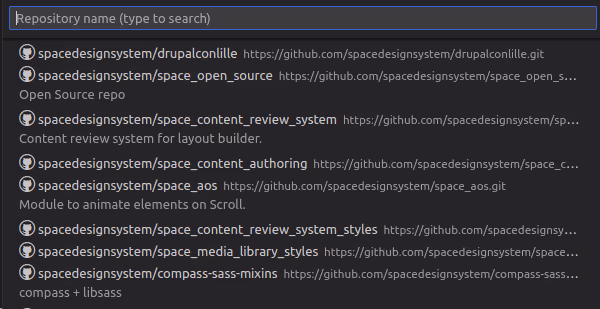
To clone a repository from GitHub, execute the Ctrl + Shift + P keys and type “git clone:” in the search bar. You will see the option “Clone from GitHub” in the drop-down menu. Click on it to show all the repository URLs, then select clone and pick a folder. VS Code will open the folder once the repository is cloned on your local machine.
Git add, commit, and push in vs code
Now that your local Git repository is in VS Code, any changes you make to the repository folder will appear on the left side in the source control section. This section provides the file list of all the changes.
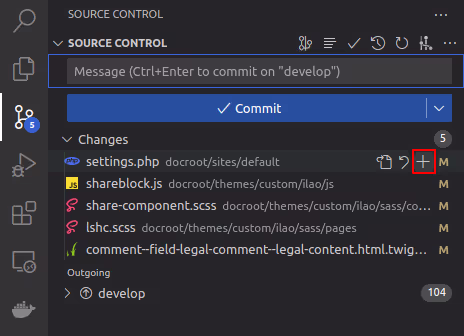
To add a file to the stage, click on the “+” sign as shown in the screenshot. This will move all your files into the staged area.
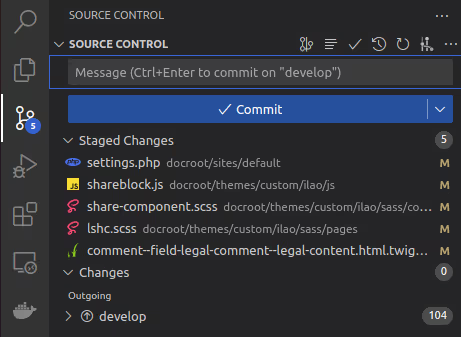
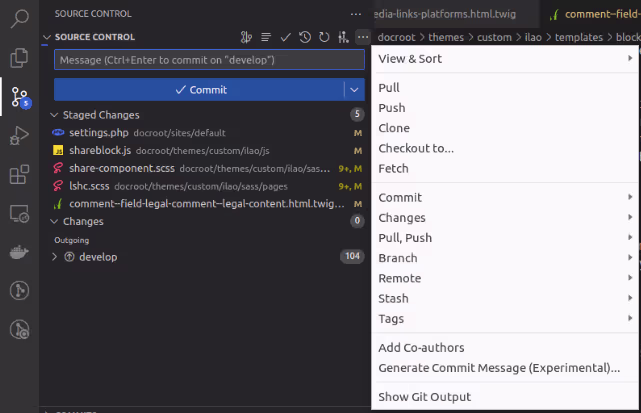
Next, type the commit message in the message box and click the checkmark “✓” button to commit the changes. To push the code, click on the “More actions” button (which looks like “…”), then select “Push” from the dropdown menu.
Git stash in vs code
When switching between branches or tasks, the git stash command comes in handy. It allows you to temporarily store your uncommitted local changes and re-apply them at any branch. To stash your changes, go to the source control on the left side of VS Code and click the ‘more actions’ button (represented by “…”). Then select Stash > Stash (Include Untracked) and add a relevant message before pressing enter. This will stash your file changes locally.

To bring the stash changes to your branch, go to source control and click on the “…” button, then select Stash > Apply Latest Stash.
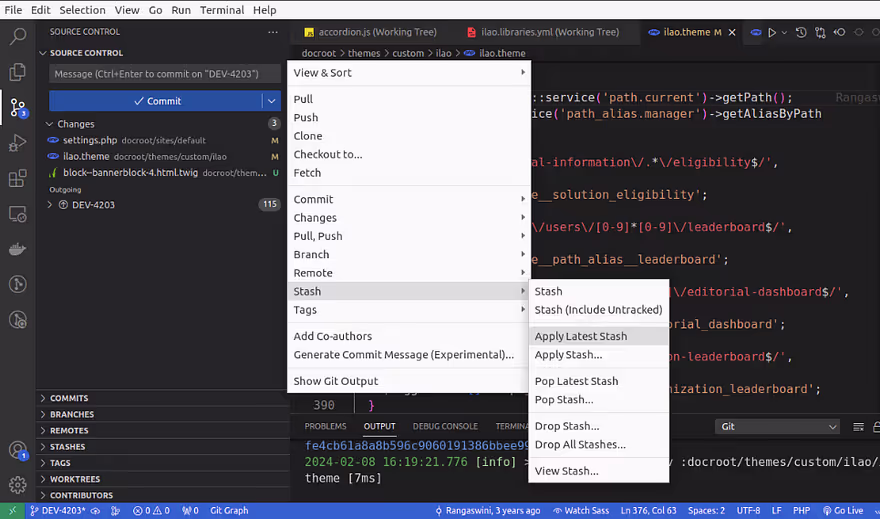
What is the difference between “Stash” and “Stash (Include Untracked)”?
- “Stash” saves only modified file changes.
- “Stash (Include Untracked)” saves all file changes, including untracked files and modified files.
What is the difference between “Apply Latest Stash” and “Apply Stash”?
- “Apply Latest Stash” applies the last stash to the current working branch and saves the topmost stash on the stash list, so you can use it later.
- “Apply Stash” provides a list of stashes, and you need to select which stash changes you want to include in your working branch.
What is the difference between “Pop Latest Stash” and “Pop Stash”?
- “Pop Latest Stash” applies the last stash to the current working branch and removes the latest or topmost stash.
- “Pop Stash” removes a specific stash from the list when you select the changes you want to include in your working branch.
What is the difference between “Drop Stash” and “Drop All Stashes”?
- “Drop Stash” allows you to drop a specific stash from the list.
- “Drop All Stashes” removes all stashes.
Note that you can apply stashes to any branch it is not specific to the branch where the stash was created.
Git cherry pick in vs code
Git cherry-picking is a process of selecting one or multiple commits from one branch and applying them to another branch. Let’s say you have a project with two branches: master and develop. The master branch has three commits (DEV-001, DEV-002, DEV-003), and the develop branch has two commits (DEV-004, DEV-005).
Now, if you want to transfer the DEV-005 branch code from the develop branch to your master branch, you need to checkout to the master branch and go to the branches section and right click on the DEV-005 commit that you want to cherry-pick, and select “cherry-pick commit”.
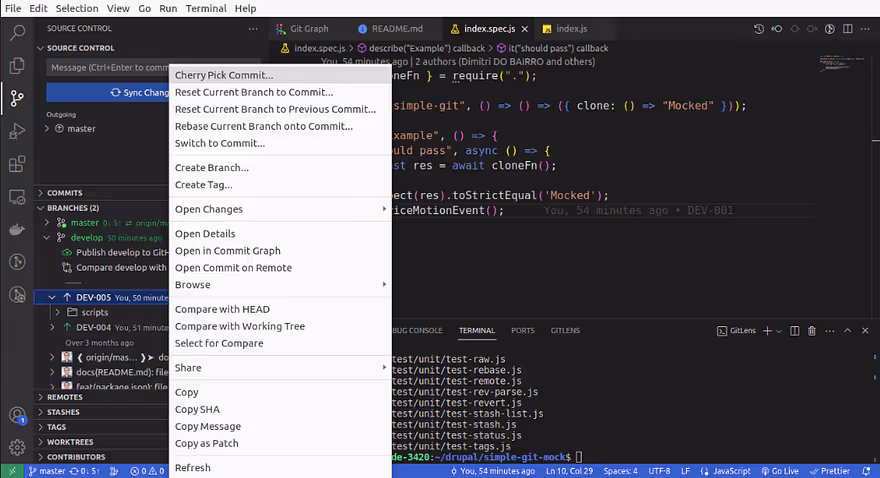
The cherry-pick was successful and DEV-005 commits are now visible in the master branch. Hopefully, this overview has helped you understand the basics of using Git and GitHub in VS Code.
Conclusion
Using Git integration in Visual Studio Code seamlessly incorporates version control into your development process. The built-in Source Control panel and terminal allow you to efficiently manage everything from initializing a repository to pushing changes to a remote repository without leaving the editor.
Hope this information helps, Happy Coding :)