

To improve a Next.js application, you have to work on its performance, user experience and resource usage optimisation. This blog post gives you three strong instruments which are Next.js Analytics, Metadata Management and Bundle Analyser in order to reach these purposes.
We will explain each tool’s functionality then offer real-life examples with code to show how it works.
Leveraging Next.js Analytics
Before we Understand the the Analytics we must understood the Web vitals
Web Vitals are a set of performance metrics introduced by Google to measure the quality of user experience on the web. These include:
- Largest Contentful Paint (LCP): Measures loading performance.
- First Input Delay (FID): Measures interactivity.
- Cumulative Layout Shift (CLS): Measures visual stability.
Getting started with Next.js Analytics
Next.js simplifies the process of collecting and reporting these metrics. You can either use th to manage reporting yourself or leverage Vercel’s managed service for automatic collection and visualization.
Step-by-Step implementation
Step 1: Create the Web Vitals component
First, create a new component to handle the reporting of web vitals. This component will use the useReportWebVitals hook provided by Next.js.
Create a file named web-vitals.js in your _components directory and add the following code:
By keeping the use client directive confined to the WebVitals component, you ensure optimal performance and maintain a clear separation of concerns.
'use client'

import { useReportWebVitals } from 'next/web-vitals'

export function WebVitals() {
  useReportWebVitals((metric) => {
    console.log(metric)
    // You can also send the metrics to your analytics server here
  })
}
Step 2: Integrate Web Vitals component into layout
Next, integrate this component into your root layout. By doing so, you ensure that web vitals are reported throughout your entire application.
Edit your layout.js file as follows:
import { WebVitals } from './_components/web-vitals'

export default function Layout({ children }) {
  return (
    <html>
      <body>
        <WebVitals />
        {children}
      </body>
    </html>
  )
Step 3: Viewing metrics
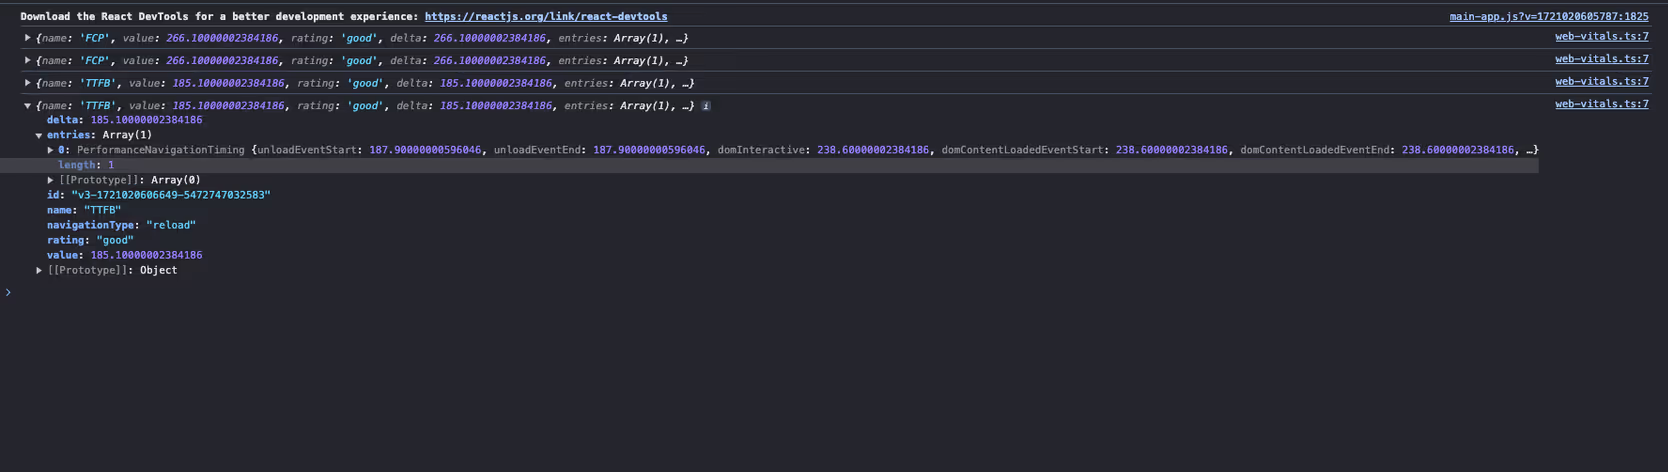
Once your application is running, you’ll start seeing the performance metrics logged to the console. For a more detailed analysis, you can send these metrics to an analytics server or use Vercel’s managed service to visualize them.
Benefits of using Next.js Analytics
1. Identify performance bottlenecks:
Collecting web vitals helps in identifying which parts of your application are causing slowdowns. This information is crucial for optimising the user experience.
2. Improve user experience:
By monitoring metrics like LCP, FID, and CLS, you can make informed decisions to improve the loading, interactivity, and visual stability of your application.
3. Enhanced SEO:
Google considers web vitals as a ranking factor. By optimizing these metrics, you can improve your site’s SEO and attract more organic traffic.
4. Easy integration with Analytics Platforms:
The hook provides an easy way to send performance data to analytics platforms, giving you a centralised view of your application's performance.
Enhancing SEO with Metadata management
Importance of Metadata management
The Next.js Metadata API enables developers to specify the application metadata they want, including meta and link tags, in the head element of their HTML.
This API offers two primary methods for adding metadata to your application:
- Config-based Metadata: Export a static metadata object or a dynamic generateMetadata function in a layout.js or page.js file.
- File-based Metadata: Add static or dynamically generated special files to route segments.
Both approaches will cause Next.js to generate the appropriate elements inside the <head> for each page automatically.
Config-based Metadata
It allows you to define metadata at page or layout level with configuration-based metadata. Export a static metadata object or a dynamic generateMetadata function for this purpose.
Static Metadata
The simplest way is to declare static metadata right in your layout.js or page.js file. This is a convenient method if pages have immutable content.
// app/layout.js
'use client';

import { useEffect } from 'react';
import { Analytics } from '@next/analytics';

export const metadata = {
  title: 'My Next.js App',
  description: 'A description of my Next.js app',
  openGraph: {
    title: 'My Next.js App',
    description: 'A description of my Next.js app',
    images: [
      {
        url: '/path/to/image.jpg',
        width: 800,
        height: 600,
        alt: 'My Next.js App',
      },
    ],
  },
  twitter: {
    card: 'summary_large_image',
  },
};

export default function RootLayout({ children }) {

  return (
    <html lang="en">
      <body>{children}</body>
    </html>
  );
Next.js will automatically add the relevant meta tags to your page's head based on the metadata object.
Dynamic Metadata
On pages where the content changes, the generateMetadata function can be used to produce metadata from props, context or external data.
// app/[id]/metadata.js
import type { Metadata } from 'next';

async function fetchData(id) {
  // Replace this with your actual data fetching logic
  return {
    title: `Post ${id} Title`,
    description: `Description for post ${id}`,
    image: '/path/to/image.jpg',
  };
}

export async function generateMetadata({ params }): Promise<Metadata> {
  const data = await fetchData(params.id);
  return {
    title: data.title,
    description: data.description,
    openGraph: {
      title: data.title,
      description: data.description,
      images: [
        {
          url: data.image,
          width: 800,
          height: 600,
          alt: data.title,
        },
      ],
    },
    twitter: {
      card: 'summary_large_image',
         },
  };
}
Benefits of Metadata optimization
- Getting more traffic through the use of meta tags because this will help them know about your site content better than before so as to boost its rating among search engine result pages (SERPs).
- People can share your article or blog on social media platforms easily if you have added the required metadata for that particular content thus increasing their involvement levels with it.
- When individuals search something online they always want quick answers and this is what can be achieved by having correct meta descriptions which provide users with instant information, making their experience great overall.
Optimizing Bundle size with Bundle Analyser
Why use the Bundle Analyser?
Assist in simplifying your application's performance in optimisation through module sizes visualisation using Next.js Bundle Analyser. Faster load times and improved app performance are some of the outcomes that can be realised when you identify bigger bundles for size reduction.
Setting up and using the Bundle Analyser
1.Install the Bundle Analyser Package:
npm install @next/bundle-analyzer2.Configure the Bundle Analyser in next.config.js:
// next.config.js
const withBundleAnalyzer = require('@next/bundle-analyzer')({
  enabled: process.env.ANALYZE === 'true',
});

module.exports = withBundleAnalyzer({
  // Your existing Next.js configuration
});3.Run the Bundle Analyser
To analyse your bundle, run the following command(As per your Package manager):
ANALYZE=true npm run build
# or
ANALYZE=true yarn build
# or
ANALYZE=true pnpm build
Using the Bundle Analyser
After you run the build command with the environment variable ANALYSER set to true, it will open a new browser window containing an interactive treemap of your bundle. This visualisation is helpful in finding large modules that may require optimisation.
Interpreting the Bundle Analyser Results
The treemap gives a visual representation of the modules in your application. A rectangle stands for each module and its size shows how much space it takes up in the bundle. You should look for modules which make the most impact on bundle size when looking at this visualization and try to optimize them.
Optimisation Techniques
1.Code Splitting:
Split your code into smaller chunks to load only what is necessary. Next.js automatically splits code at the page level, but you can manually split components if needed.
// Example of dynamic import
import dynamic from 'next/dynamic';

const HeavyComponent = dynamic(() => import('../components/HeavyComponent'), {
  loading: () => <p>Loading...</p>,
});

export default function Home() {
  return (
    <div>
      <h1>Home Page</h1>
      <HeavyComponent />
    </div>
  );
}
2.Tree Shaking:
Ensure your project is configured to remove unused code. This is typically handled by your build tool (e.g., Webpack) but ensure that you are not importing entire libraries when only a subset of functionality is needed.
// Importing specific functions instead of the entire lodash library
import debounce from 'lodash/debounce';
3.Minification:
Ensure your JavaScript and CSS are minified. This is generally handled by Next.js during the build process.
4.Removing Unused Dependencies:
Regularly audit your dependencies to remove any that are no longer used or are unnecessarily large.
Benefits of Bundle Optimisation
- Smaller bundles load faster, so your users get a better experience of your sites.
- Optimised bundles reduce JS amounts that require parsing and execution.
- Faster websites may rank higher in search engines.
Conclusion
Optimising your Next.js application is crucial for providing a fast and seamless user experience. By leveraging Next.js Analytics, Metadata Management, and the Bundle Analyser, you can gain valuable insights, enhance SEO, and reduce bundle size.
Implementing these tools and techniques will help ensure your application performs efficiently and effectively, providing users with the best possible experience.
Summary
- Next.js Analytics: Track performance metrics and user interactions to identify and address bottlenecks.
- Metadata Management:Improve SEO and social media sharing through proper metadata configuration.
- Bundle Analyser: Visualise and optimise your application's bundle size for faster load times and improved performance.
Additional Resources
Reorganise your process of writing Next.js to incorporate these methods and tools, resulting in a fast and responsive application that users will love.